There’s something magical about the moment when whole dry red chillies hit hot oil. The sizzle, the darkening colour, that sharp, smoky aroma rising from the pan—it transforms an ordinary dish into something deeply flavoured and authentically Indian. Tempering isn’t just a cooking step; it’s the foundation of taste in countless regional recipes. Without it, dals taste flat, curries lack depth, and chutneys miss that essential kick.
I’ve been working with spices for over fifteen years, and I can tell you that tempering with dry red chillies is both an art and a science. Get the timing right, and you unlock layers of flavour. Rush it or overheat the oil, and you’re left with bitterness and burnt specks floating in your food. Let me walk you through exactly how to do this properly, the way it’s been done in traditional Indian kitchens for generations.
What Happens During the Tempering Process
When dry red chillies meet hot oil or ghee, their essential oils release into the fat. This isn’t just about adding heat—it’s about extracting the chilli’s complex flavour compounds and distributing them throughout your dish. The capsaicin becomes more bioavailable, the fruity undertones emerge, and the colour infuses into the cooking medium.
This technique, known as tadka in Hindi, creates what food scientists call “fat-soluble flavour blooming.” The heat opens up the dried chilli’s structure, allowing its aromatics to escape and bind with the fat molecules. That’s why tempered dishes taste richer and more layered than those where spices are simply added dry.
Selecting Your Dry Red Chillies
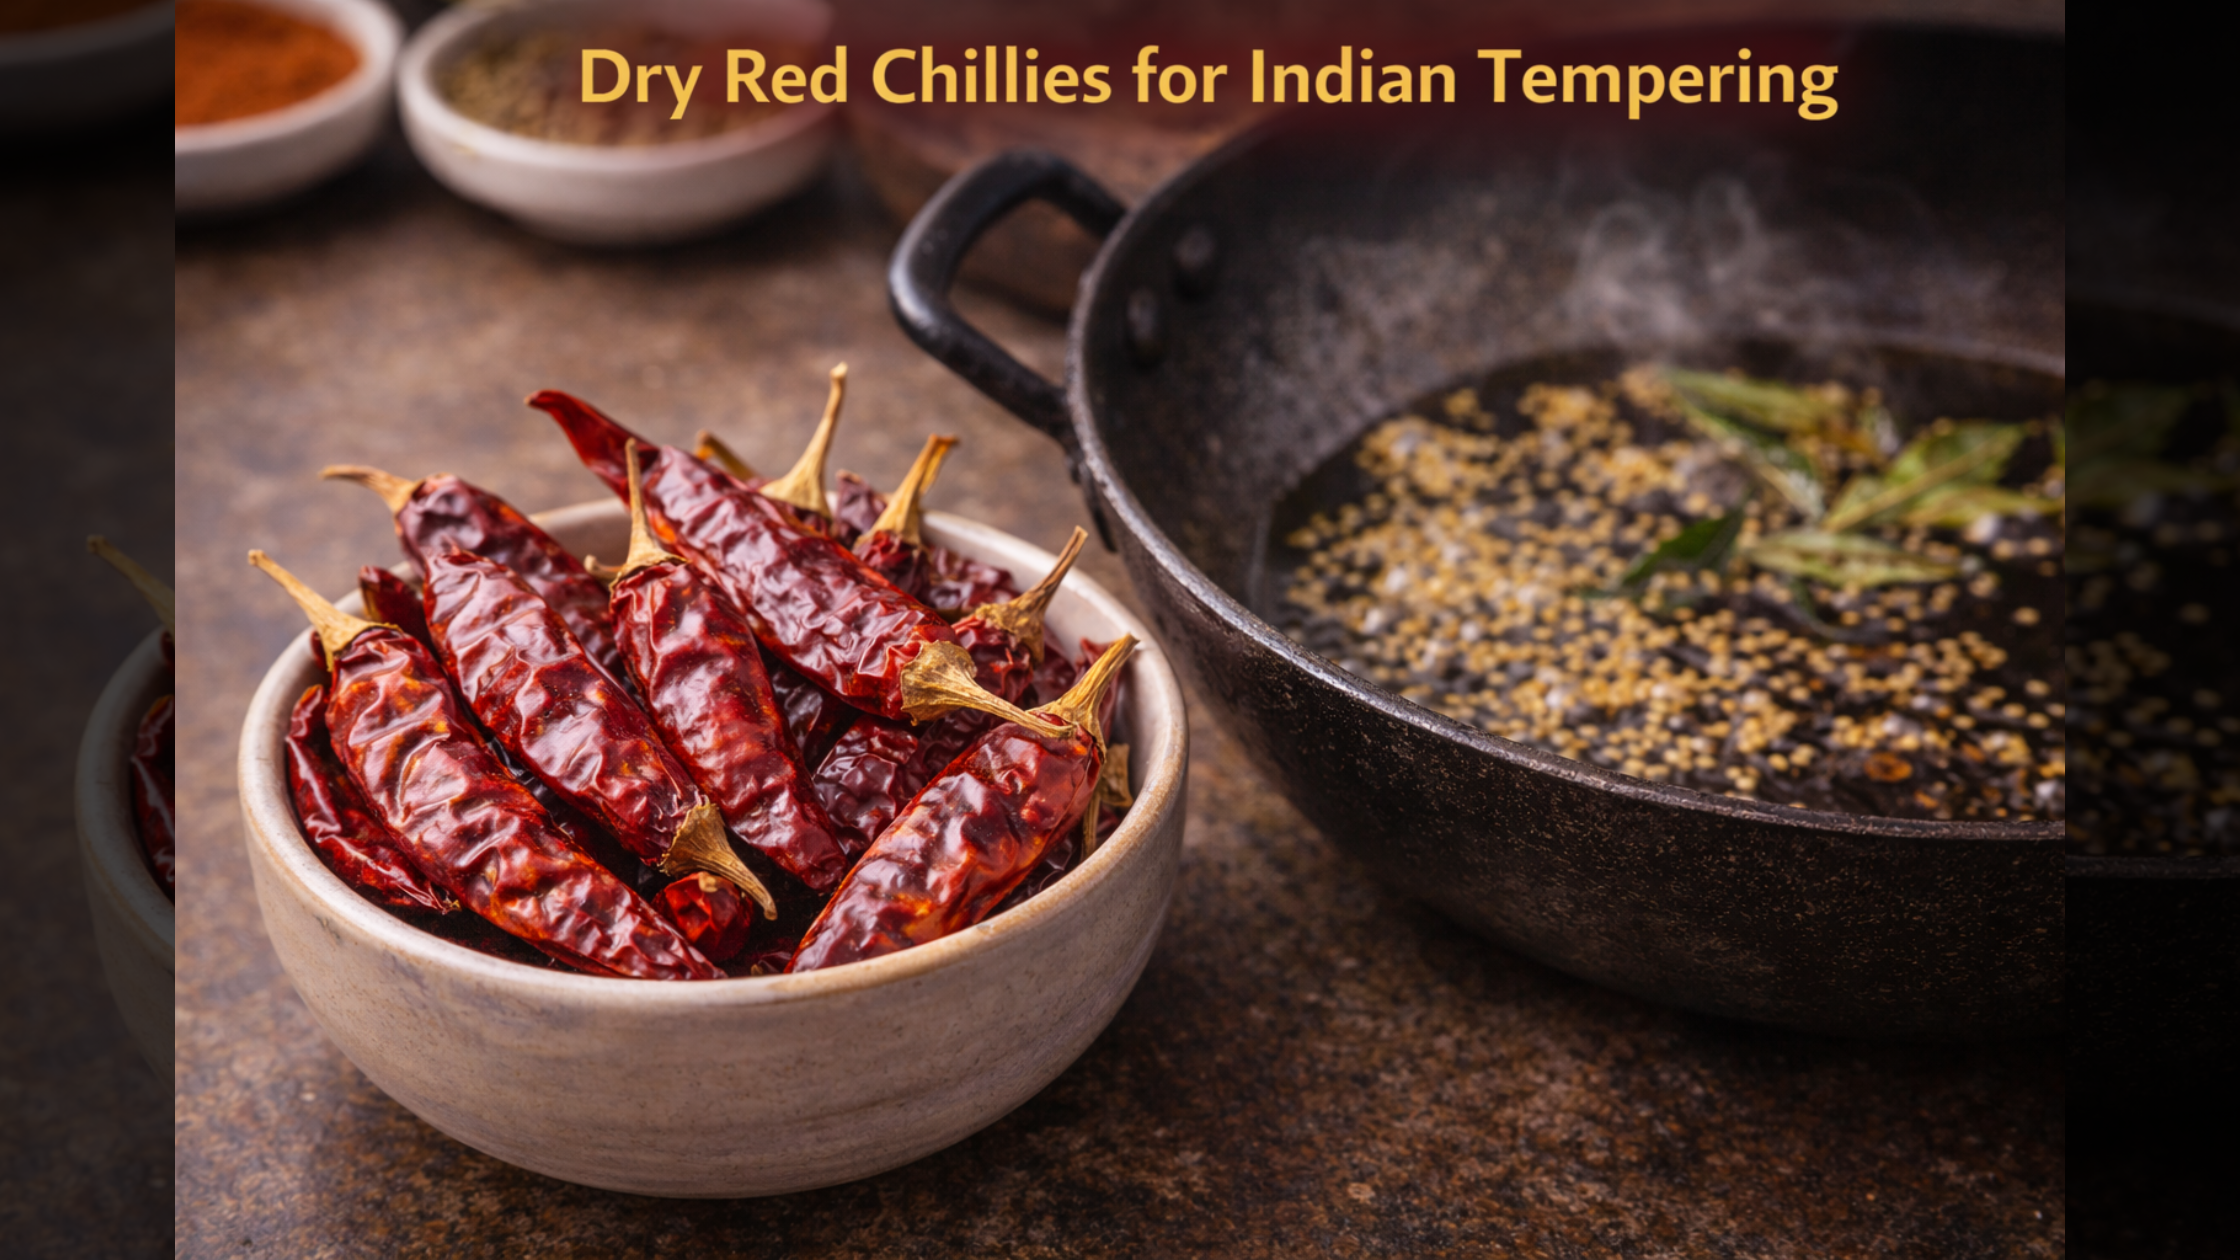
Not all dry red chillies work the same way in tempering. Kashmiri chillies give brilliant colour with mild heat—perfect for curries and dals where you want vibrant redness without overwhelming spice. Byadgi chillies offer similar qualities and are favoured in South Indian cooking. For aggressive heat, go with smaller varieties like the bird’s eye chilli or the fiery Guntur chilli from Andhra Pradesh.
When sourcing chillies, look for ones that are still pliable, not completely brittle. They should have a deep, uniform colour without pale patches or mould spots. Quality matters immensely here. Export-grade chillies from reliable suppliers maintain consistent moisture content and flavour profiles, which is why many professional kitchens and food businesses trust established suppliers for their spice needs.
Preparing Chillies Before Use
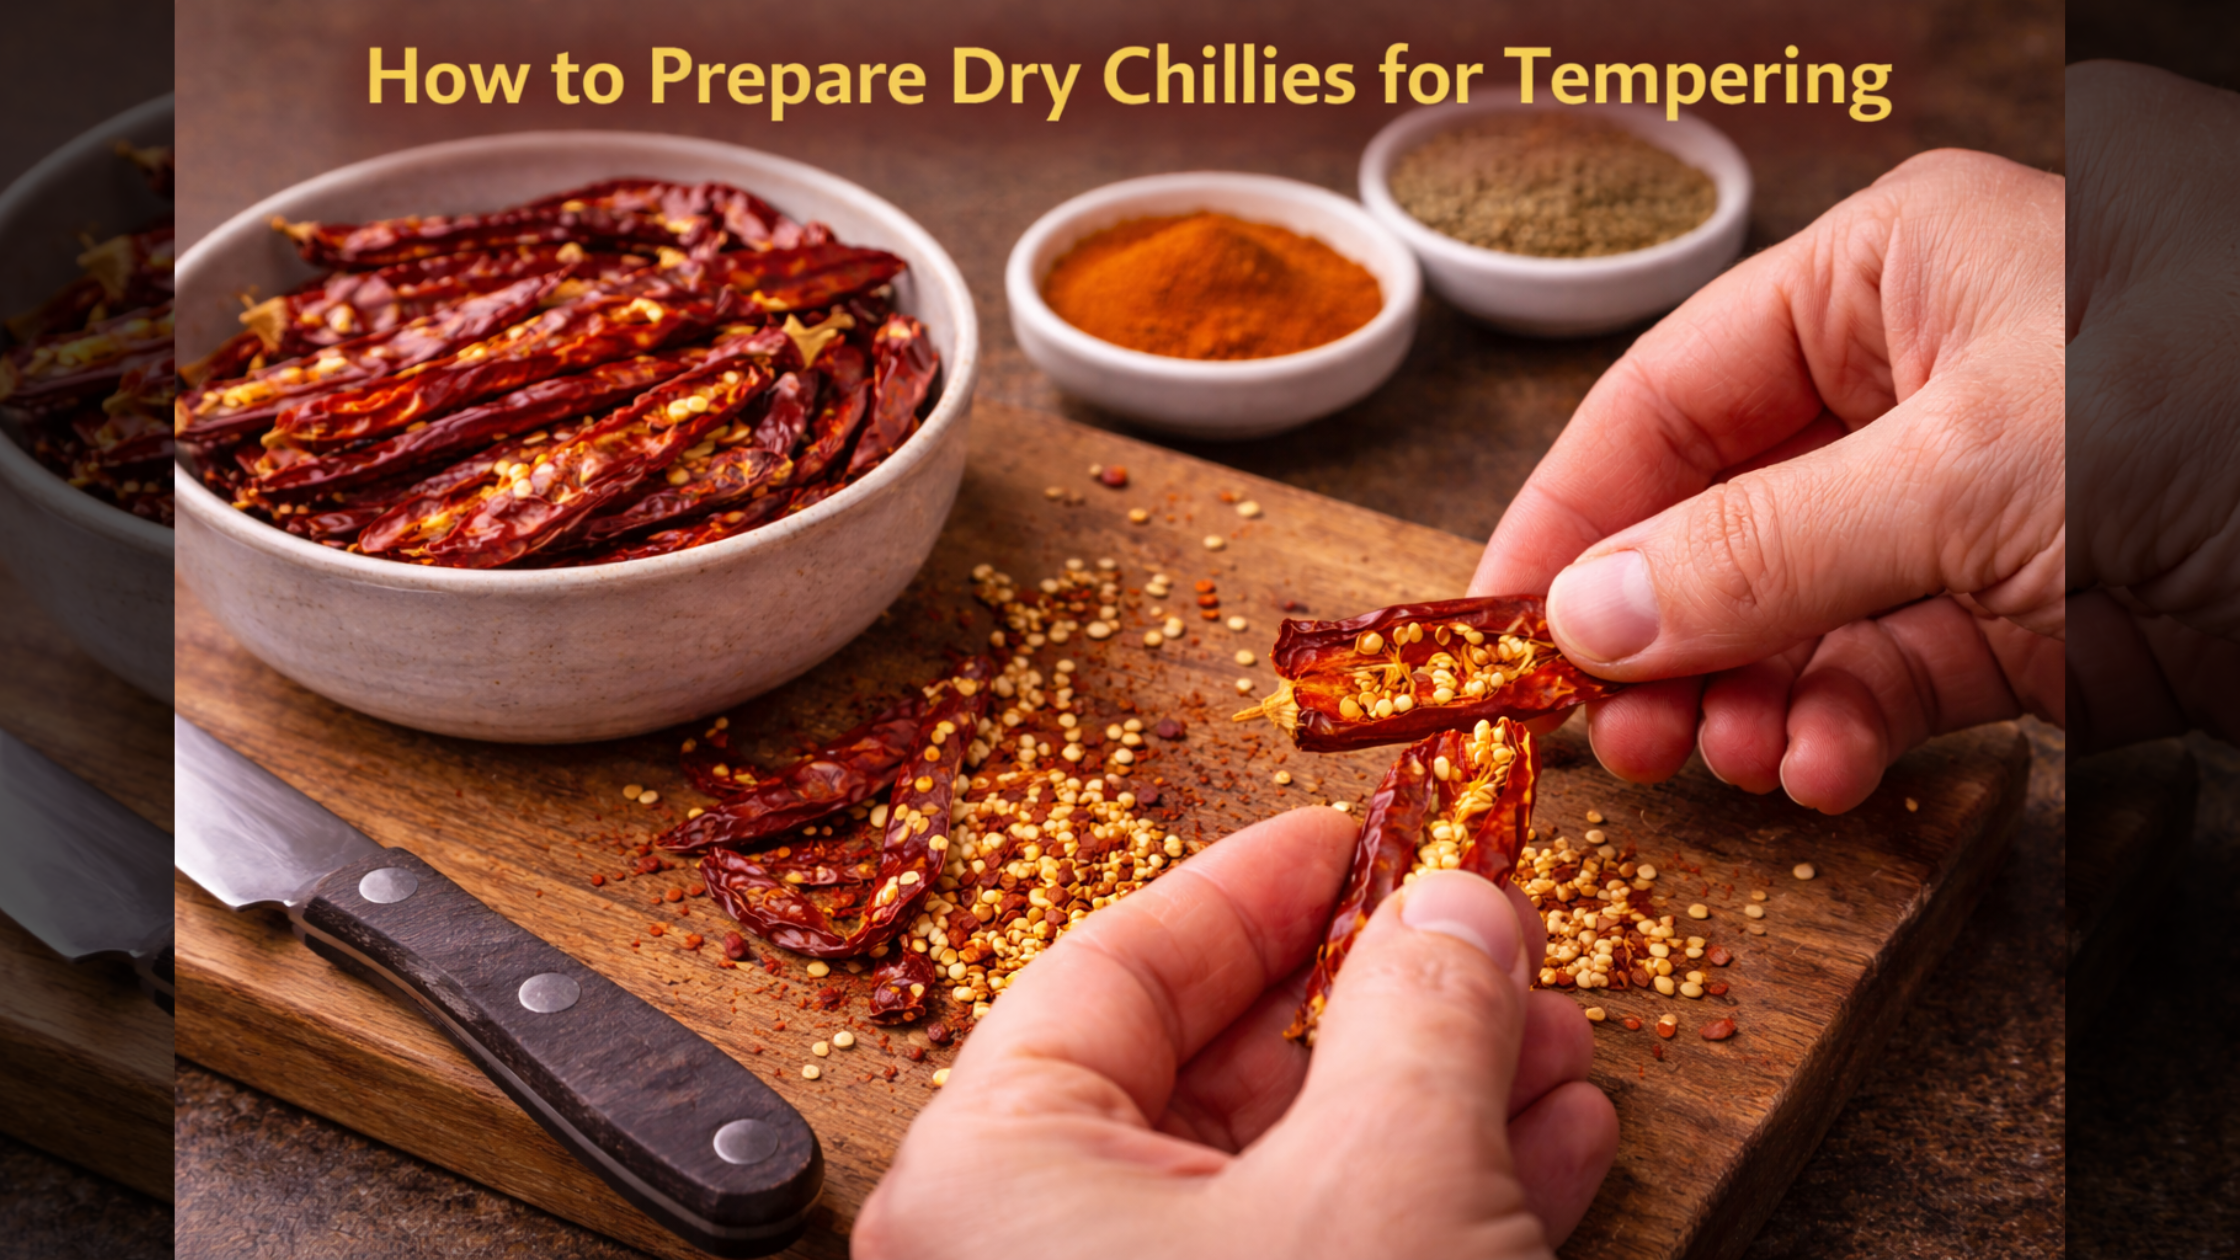
Never temper chillies straight from storage without checking them first. Break off the stem end and gently shake out the seeds if you want to reduce the heat level while keeping the flavour. Some cooks prefer to wipe each chilli with a damp cloth to remove any dust—a small step that makes a noticeable difference in the final taste.
For recipes requiring a deeper colour infusion, you can break the chillies into two or three pieces before tempering. This exposes more surface area to the oil, intensifying both colour and flavour. However, for visual appeal in dishes like sambar or rasam, keeping them whole creates a more traditional presentation.
Choosing Between Oil and Ghee
Your choice of fat directly impacts the final flavour profile. Ghee brings nutty, caramelised notes that complement lentil dishes beautifully. It has a lower smoke point than most oils, so you need to be more careful with temperature control. Coconut oil is traditional in Kerala and coastal Karnataka, adding its own distinct character to vegetable preparations sourced from regions rich in fresh fruits & vegetables.
Refined sunflower or rice bran oil works when you want the chilli flavour to dominate without competing aromatics. Mustard oil, common in Bengali and Punjabi cuisines, adds pungency that pairs well with robust beans fruits and root vegetables. The key is matching your fat choice to your regional cooking style.
Mastering Heat Control
This is where most home cooks go wrong. The oil needs to be hot enough to sizzle the chillies on contact, but not so hot that they blacken within seconds. I’ve found that medium-high heat works best—when you hover your hand a few inches above the pan, you should feel strong warmth but not scorching heat.
A reliable test: drop a single mustard seed into the oil. If it sputters and dances immediately, your temperature is right. If it just sits there, wait longer. If it burns instantly, reduce the heat and give the oil thirty seconds to cool slightly.
Professional chefs in establishments that work with quality ingredients from vegetables exporter businesses know that consistent heat management prevents waste and ensures every batch turns out perfectly.
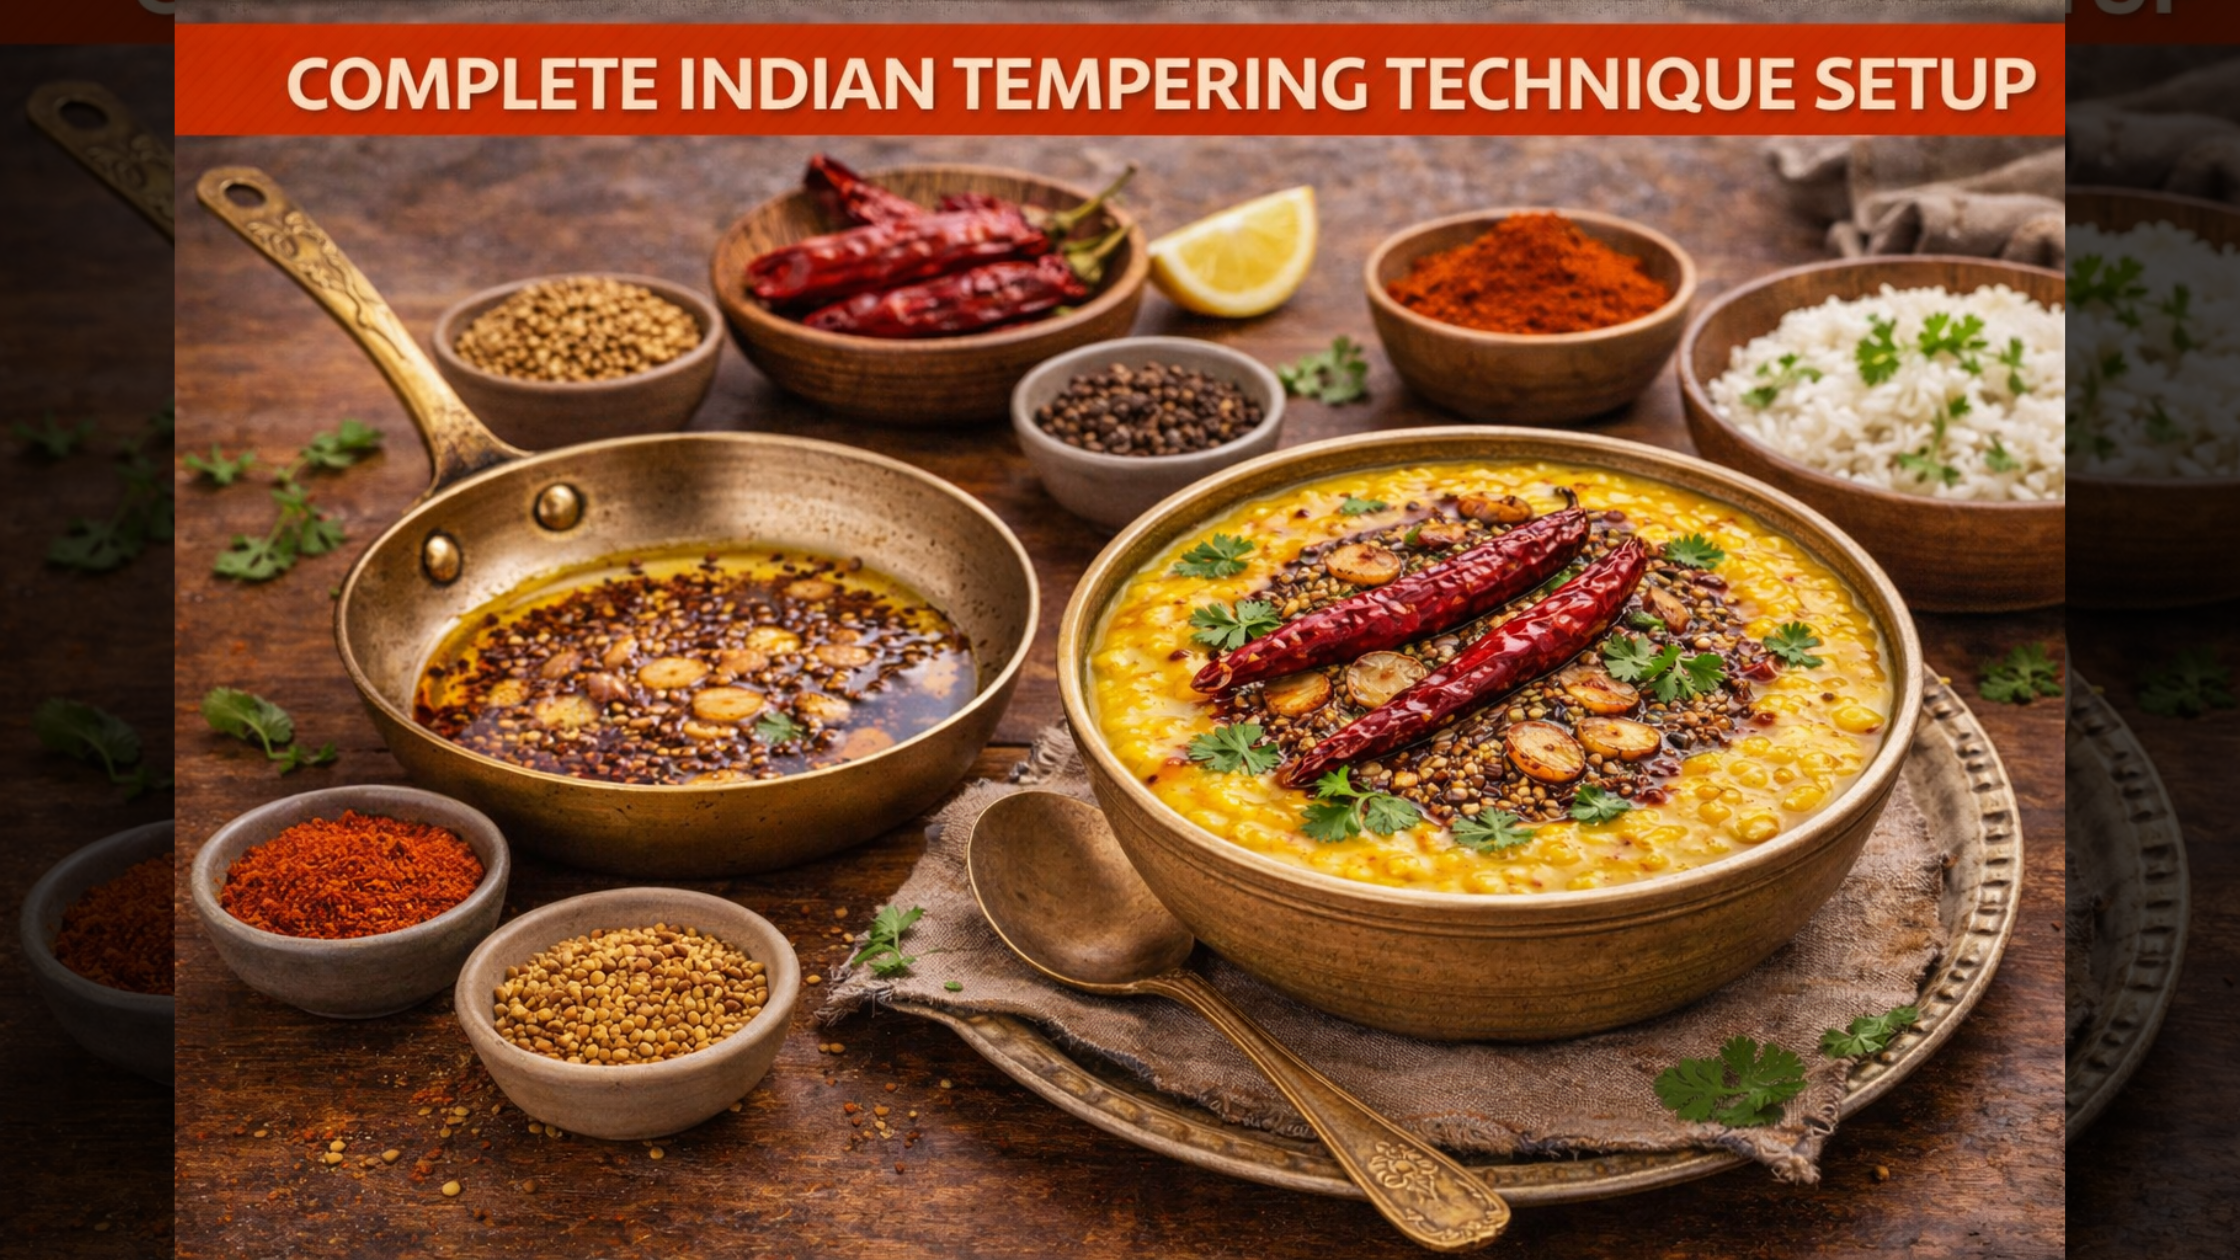
The Step-by-Step Tempering Technique
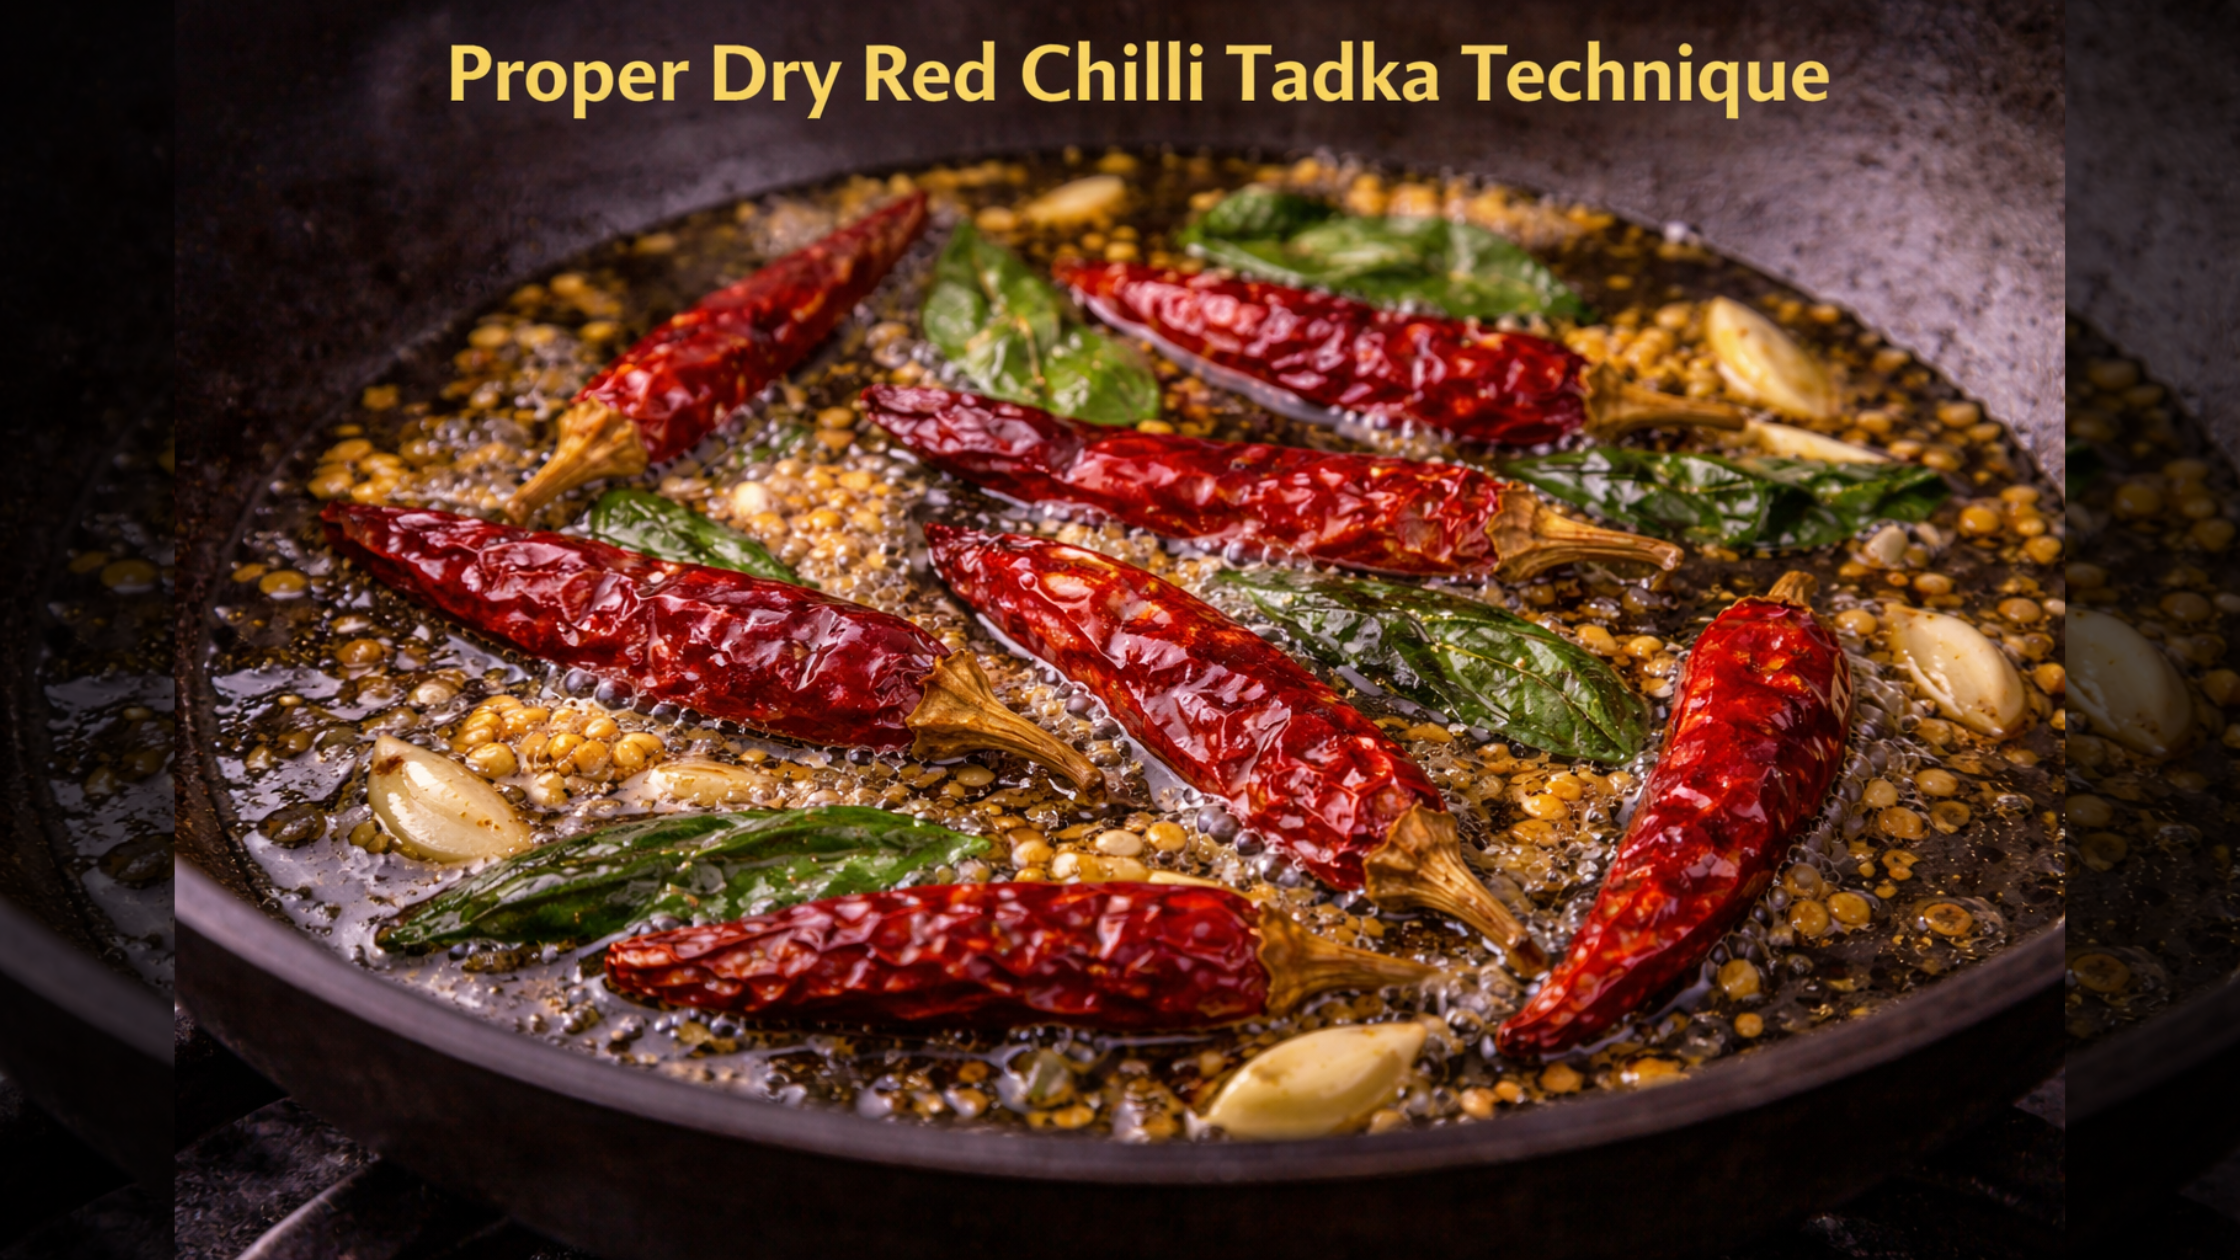
Start by heating your chosen fat in a small, heavy-bottomed pan or tadka ladle. Two to three tablespoons is usually sufficient for four servings. Once the oil shimmers and shows slight movement, reduce heat slightly—this prevents the first chilli from burning before you add the rest.
Add your whole dry red chillies. They should sizzle immediately and begin to darken within five to eight seconds. Don’t walk away—this happens fast. As soon as they turn a shade darker (not black, just deeper red-brown) and release their aroma, remove the pan from heat. The residual temperature will continue the process for another few seconds.
If you’re adding other tempering ingredients like mustard seeds, cumin, or curry leaves, follow the right sequence: mustard seeds first, then cumin and dry red chillies together, and curry leaves last. Each ingredient has its own optimal heating time.
Immediately pour the entire tempering—oil and spices together—over your prepared dish. Stir it through while everything is still hot. This distributes the flavour evenly and prevents the spices from continuing to cook and potentially burn.
Common Mistakes and How to Avoid Them
Burning the chillies: This creates acrid bitterness that ruins an entire dish. If you smell even a hint of char, discard that batch and start fresh. There’s no salvaging burnt tempering.
Using too little oil: The chillies need to be submerged or at least well-coated to bloom properly. Skimping on fat means uneven flavour extraction.
Adding chillies to cold oil: This defeats the entire purpose. The sudden heat shock is what triggers the flavour release. Gradual heating just dries them out without the aromatic bloom.
Overcrowding the pan: If you’re tempering for a large batch, work in multiple smaller lots rather than cramming everything into one pan. Overcrowding drops the oil temperature too quickly.
Wrong chilli size for your dish: Whole chillies work for liquid-based dishes where they can infuse gradually. For dry preparations like vegetable stir-fries using produce from fresh fruits & vegetables sources, crushed or roughly broken chillies integrate better.
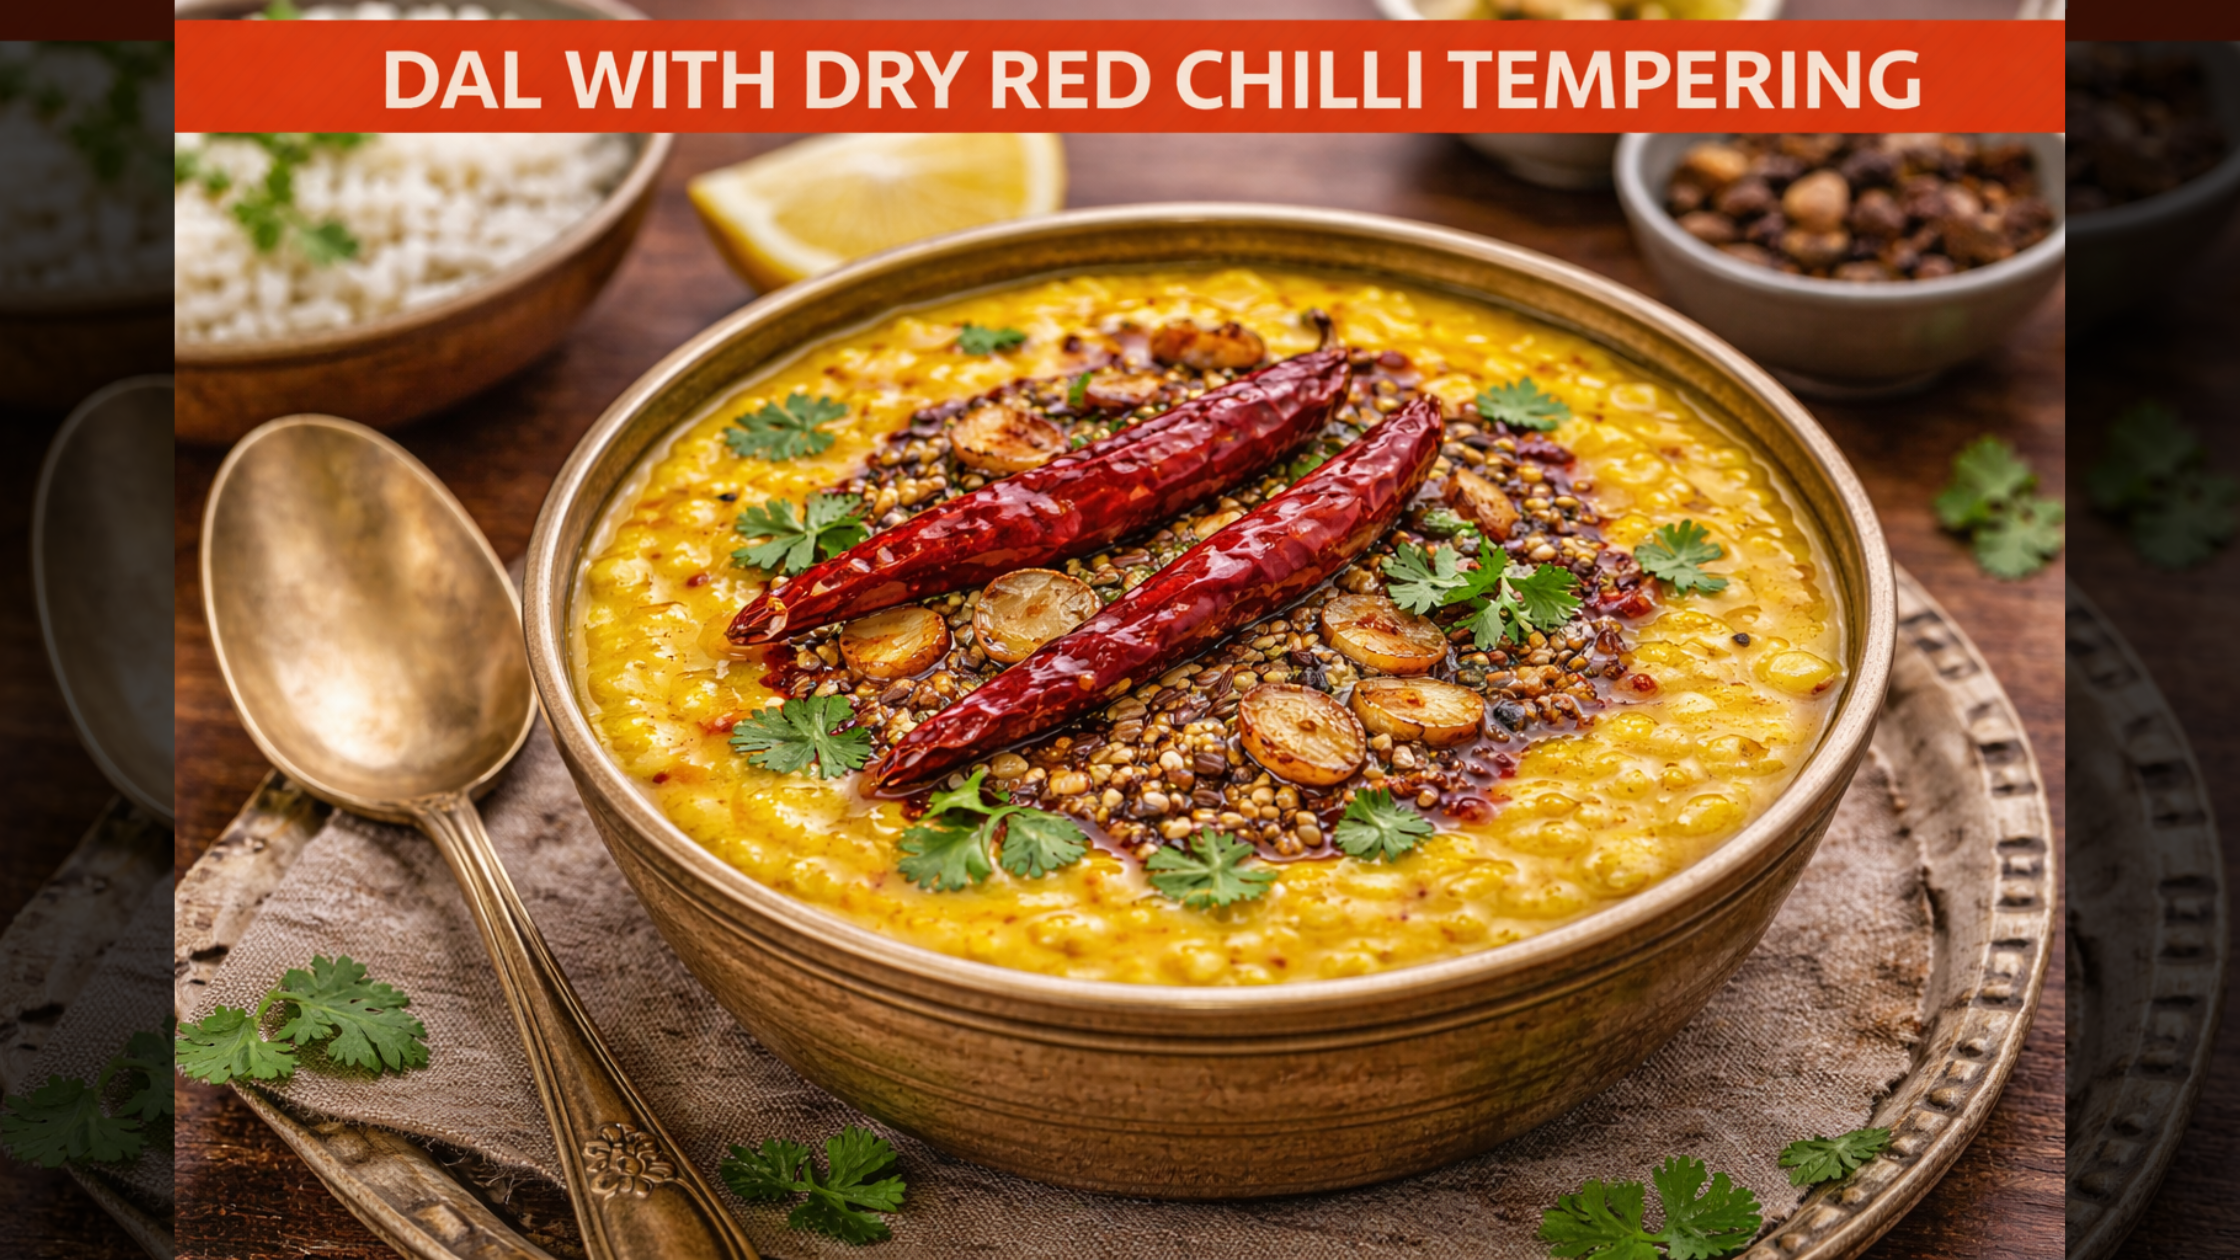
Where Dry Red Chilli Tempering Shines
This technique is essential in South Indian sambar, where the tempering is added at the very end to preserve its sharp aroma. It’s equally crucial in dal tadka, transforming simple lentils into a restaurant-quality dish. Rasam, that tangy, peppery soup, depends entirely on a perfect dry red chilli and curry leaf tempering for its distinctive character.
North Indian rajma and chole benefit from an initial tempering that builds the gravy base. Dry vegetable curries like begun bhaja (Bengali eggplant fry) or bhindi masala need that final flourish of tempered chillies for completeness. Even rice dishes like pulao and biryani sometimes incorporate a light tempering layer for added complexity.
Quality Ingredients Make the Difference
Working with premium ingredients elevates any cooking technique, and tempering is no exception. This is where sourcing matters. Vipra Overseas specializes in exporting high-quality agricultural products including fresh fruits, fresh vegetables, beans fruits, frozen products, spices, and grains to markets worldwide.
When restaurants and food businesses work with reliable exporters who understand quality standards, consistency follows naturally. Whether you’re a home cook looking for export-grade spices or a culinary professional requiring bulk supplies of premium produce, partnering with established agro-export companies ensures you’re working with ingredients that perform reliably every single time.
The same dry red chillies that enhance your home cooking also represent India’s agricultural excellence in international markets. Knowing your spices come from trusted sources gives you confidence in your tempering results.
Bringing It All Together
Mastering tempering with dry red chillies isn’t complicated, but it does require attention and practice. Start with good-quality chillies, use adequate fat at the right temperature, watch your timing carefully, and don’t be afraid to start over if something goes wrong.
The difference between mediocre and exceptional Indian cooking often comes down to these small techniques—the ones that don’t appear in ingredient lists but change everything about how a dish tastes. Once you’ve nailed the fundamentals of dry red chilli tempering, you’ll notice the improvement across your entire cooking repertoire.
Keep your heat controlled, your timing sharp, and your ingredients fresh. That’s the foundation of authentic Indian flavour, one sizzling tadka at a time.