Toasting dry red chillies is one of those fundamental techniques that separates amateur cooking from truly flavourful dishes. When done correctly, it transforms ordinary dried chillies into aromatic powerhouses that elevate curries, chutneys, and spice blends. Yet I’ve seen countless home cooks and even commercial kitchens struggle with this seemingly simple process, ending up with either under-toasted chillies that lack depth or burnt ones that bring bitterness to an entire dish.
The difference between perfectly toasted chillies and ruined ones often comes down to understanding what’s actually happening during the roasting process and knowing exactly when to stop.
What Happens During the Toasting Process
When dry red chillies meet heat, several chemical reactions occur simultaneously. The natural oils within the chilli begin to release, carrying aromatic compounds that were previously locked inside. These volatile compounds create that distinct smoky, earthy fragrance that makes your kitchen smell like a professional Indian restaurant.
The cell structure of the dried chilli also changes. As moisture escapes and the chilli darkens slightly, it becomes more brittle and easier to grind into powder. This is why toasted chillies produce finer, more flavourful spice powders compared to raw dried ones.
Temperature control is everything here. Between 150 to 180 degrees Celsius, you’re developing flavour. Above 200 degrees, you’re creating bitterness and destroying the very compounds you’re trying to enhance.
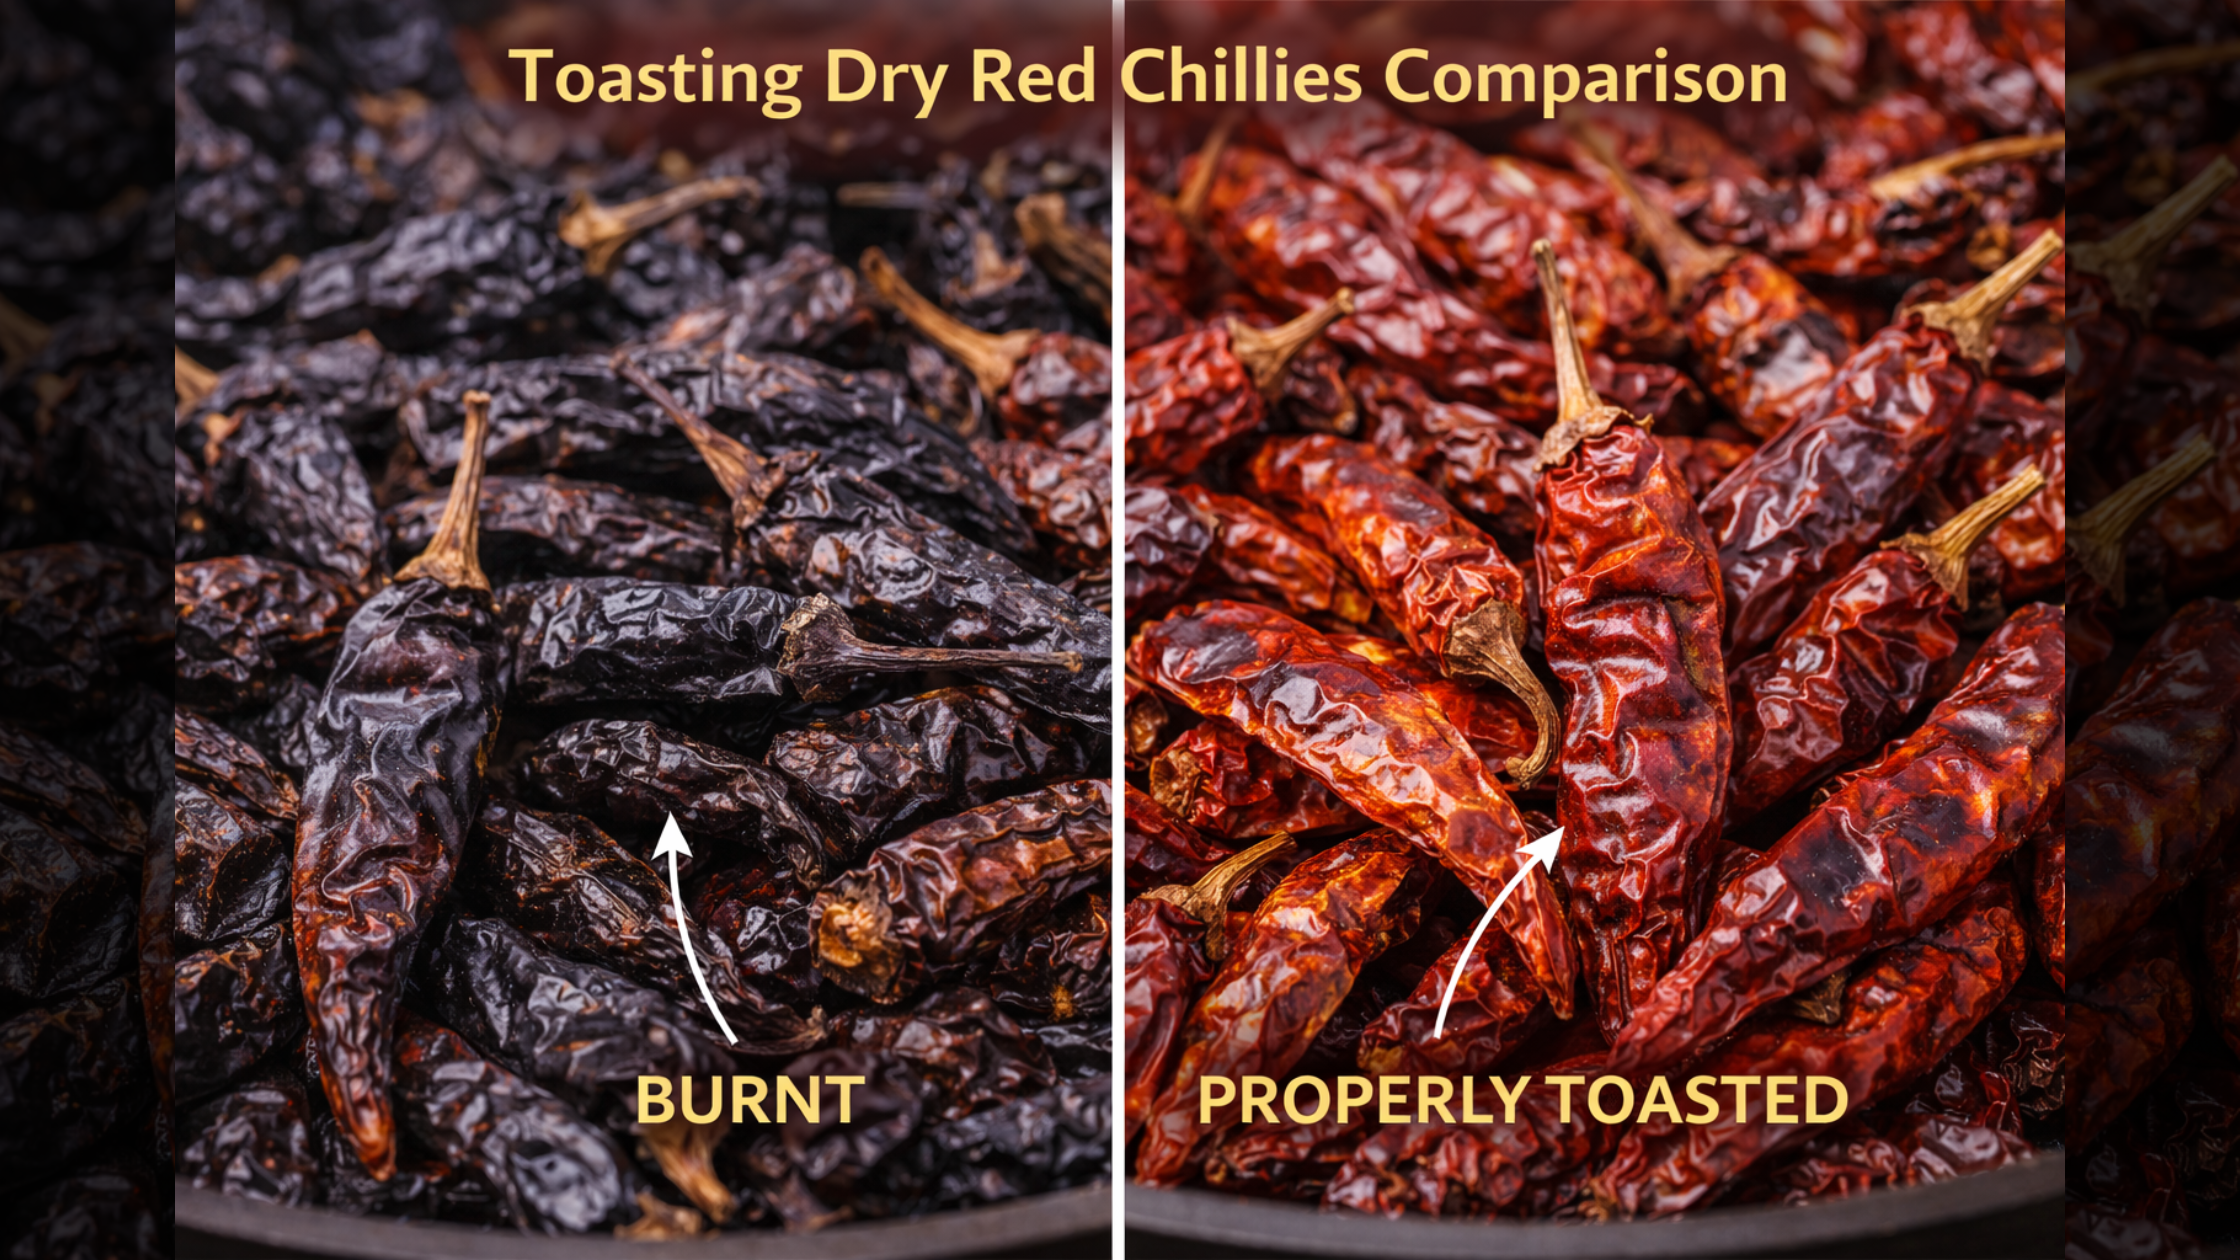
Recognizing Properly Toasted Versus Burnt Chillies
A properly toasted dry red chilli will darken by just one or two shades. It should remain pliable enough to bend slightly before snapping. The aroma should be warm and inviting, never acrid or sharp.
Burnt chillies, on the other hand, turn almost black. They become extremely brittle, crumbling at the slightest touch. The smell is unmistakable—harsh, bitter, and unpleasant. Once burnt, there’s no salvaging them for culinary use.
The window between perfect and ruined is often just 15 to 30 seconds, which is why constant attention matters more than precise timing.
Selecting the Right Dry Red Chillies for Toasting
Not all dried chillies toast the same way. Kashmiri chillies, prized for their vibrant colour and mild heat, toast quickly and require lower temperatures. Byadgi chillies offer similar characteristics and are excellent for making chilli powder after toasting.
For dishes requiring more heat, varieties like Guntur or Teja chillies work well, though their higher capsaicin content means they can develop bitterness more readily if overheated. When sourcing from a supplier vegetable or spice vendor, ask specifically about the harvest date and drying method, as these factors affect toasting behaviour.
Fresh stock from quality suppliers ensures better oil content, which directly translates to superior aroma development during toasting.
Preparation Steps Before You Begin
Never toast chillies straight from storage without proper preparation. First, wipe each chilli with a dry cloth to remove any dust or debris that accumulates during processing and storage. Check for stems and remove them, as they can burn faster than the chilli itself.
If your chillies seem excessively dry or brittle, you may be working with older stock. While still usable, they’ll require even more careful heat management to prevent burning.
For dishes where you’ll be using chilli powder, consider removing seeds before toasting. Seeds toast faster than the flesh and can create uneven results. However, for whole chilli usage in tempering, keeping seeds intact is perfectly acceptable.

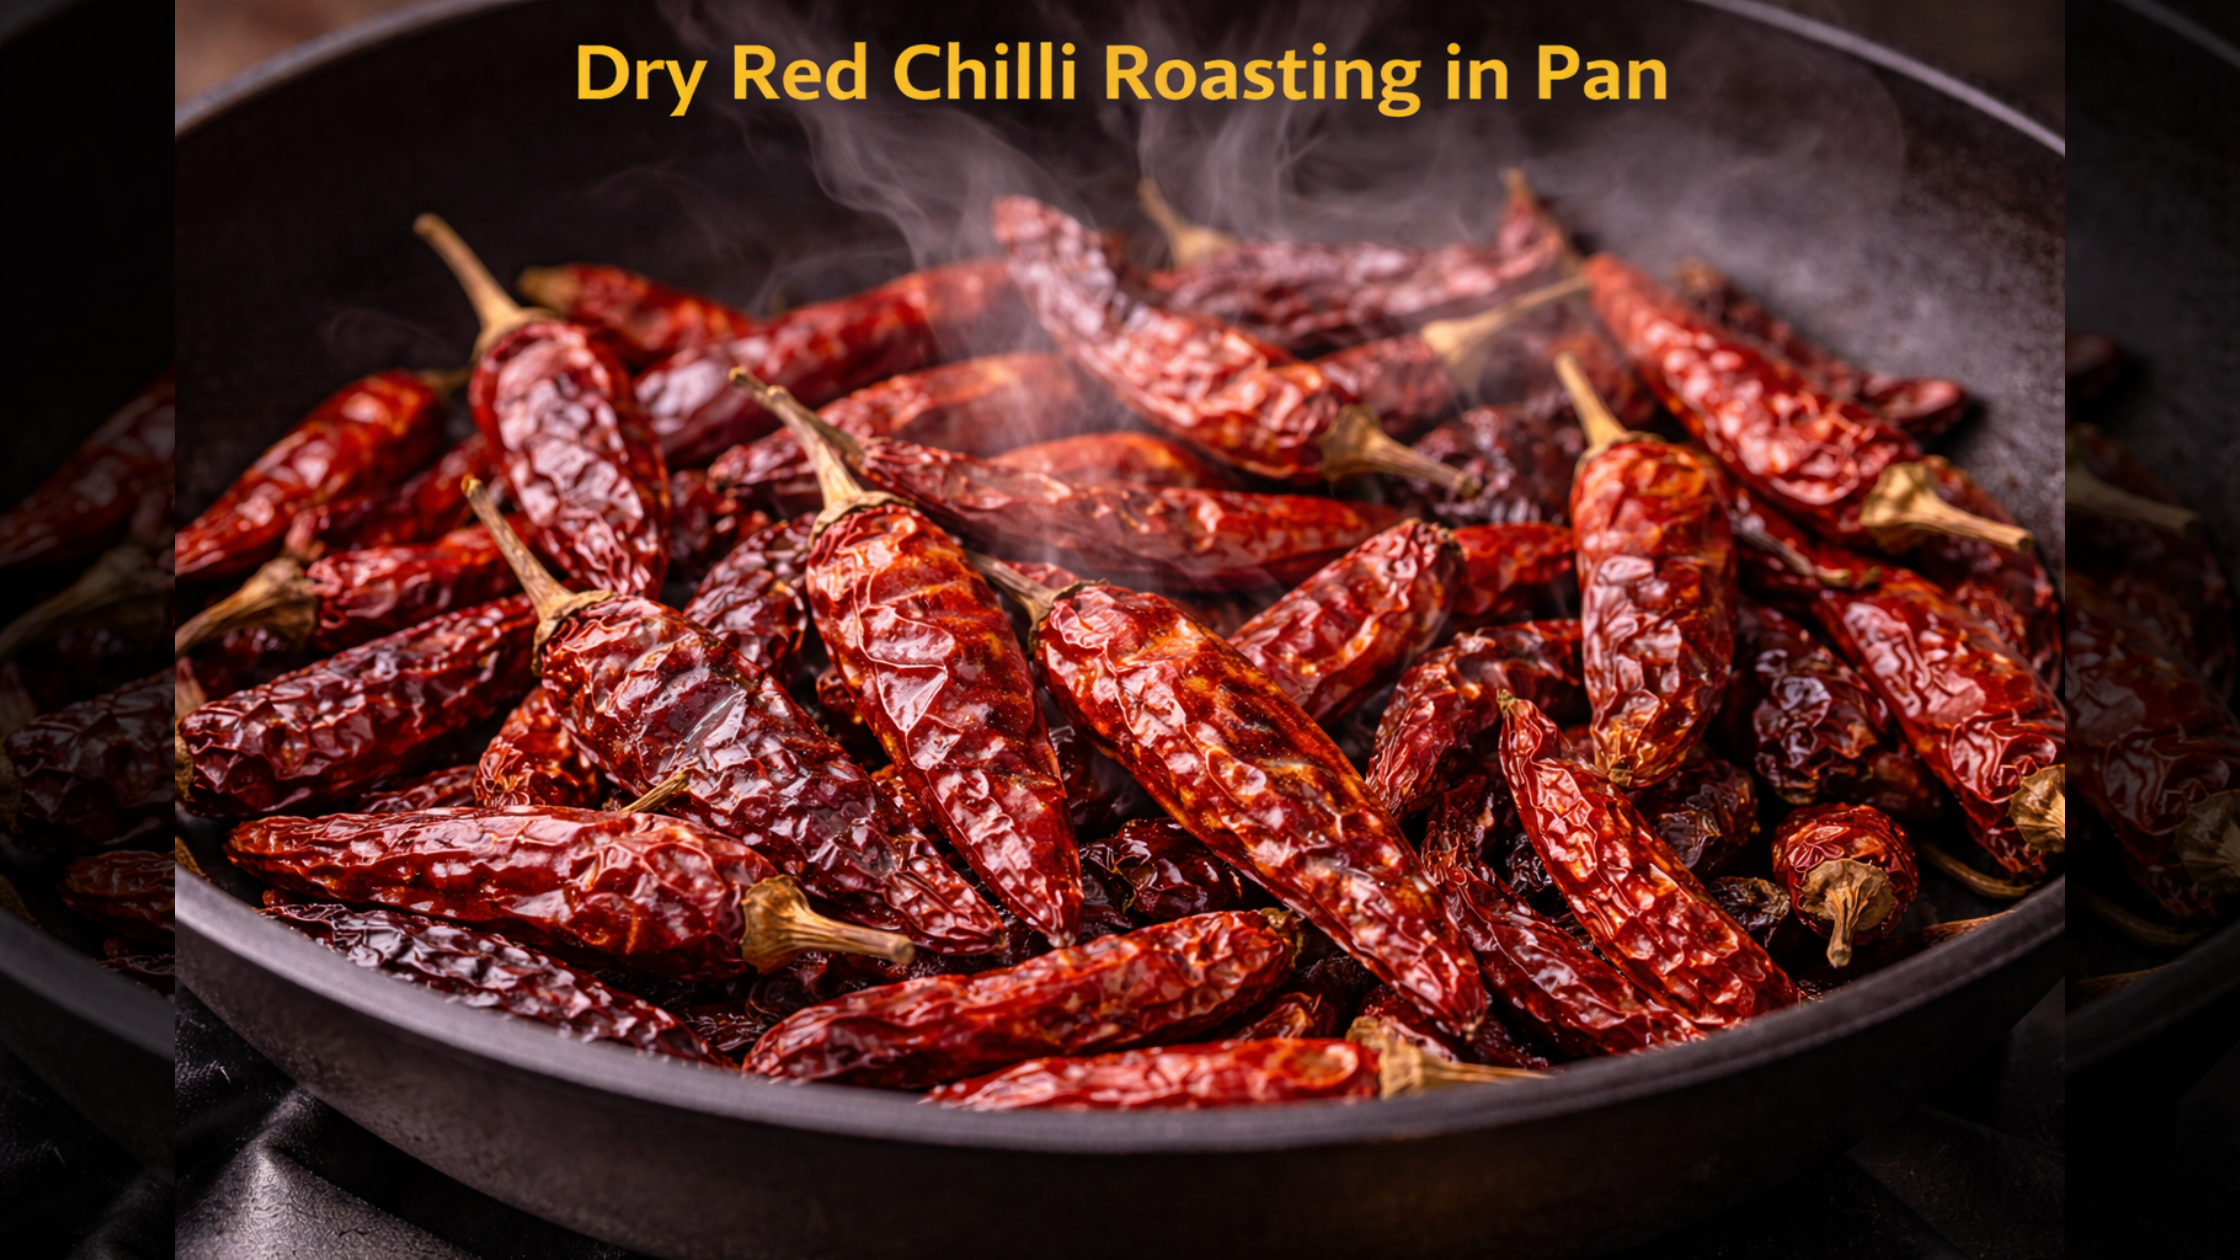
Heat Levels and Cooking Surface Selection
A heavy-bottomed pan, preferably cast iron or thick stainless steel, distributes heat more evenly than thin pans. This prevents hot spots that can burn some chillies while leaving others barely toasted.
Medium-low heat is your starting point. Place the pan on the burner and let it warm for about a minute before adding chillies. The pan should feel warm to the touch but not hot enough that water droplets would sizzle and evaporate instantly.
Add chillies in a single layer. Overcrowding creates steam pockets that interfere with proper toasting. You should be able to see the pan surface between most chillies.
No oil is needed or wanted. Dry roasting allows the chillies’ own oils to emerge and coat the surface, creating that characteristic sheen you’ll notice on well-toasted specimens.
Visual and Aroma Indicators to Monitor
Within the first 30 seconds, you’ll notice the chillies becoming slightly more glossy as their oils begin releasing. Keep them moving constantly—a gentle shake of the pan every few seconds prevents uneven heating.
Around the 60 to 90 second mark, a light smoke will appear and the aroma will intensify noticeably. This is your signal that you’re approaching the perfect moment.
Watch for the colour shift. When the chillies have darkened just slightly and that warm, toasted aroma fills your kitchen, immediately remove the pan from heat. The residual heat in the pan will continue toasting for another 10 to 15 seconds, so transfer the chillies to a cool plate or bowl right away.
The entire process typically takes between 90 seconds to two and a half minutes, depending on chilli variety and thickness.
Common Mistakes That Destroy Your Results
The biggest error I see is multitasking during toasting. Those 90 seconds demand your complete attention. Turning away to chop something or answer a phone call is how chillies go from perfect to burnt.
Using high heat to “speed things up” is another frequent mistake. High heat creates surface charring before the interior oils have properly released, giving you chillies that look toasted but lack depth of flavour.
Toasting wet or damp chillies creates steam instead of dry heat. This results in chillies that soften rather than become brittle, and they won’t develop the characteristic roasted aroma properly.
Finally, leaving toasted chillies in the hot pan is guaranteed to ruin your work. Always transfer immediately to stop the cooking process.
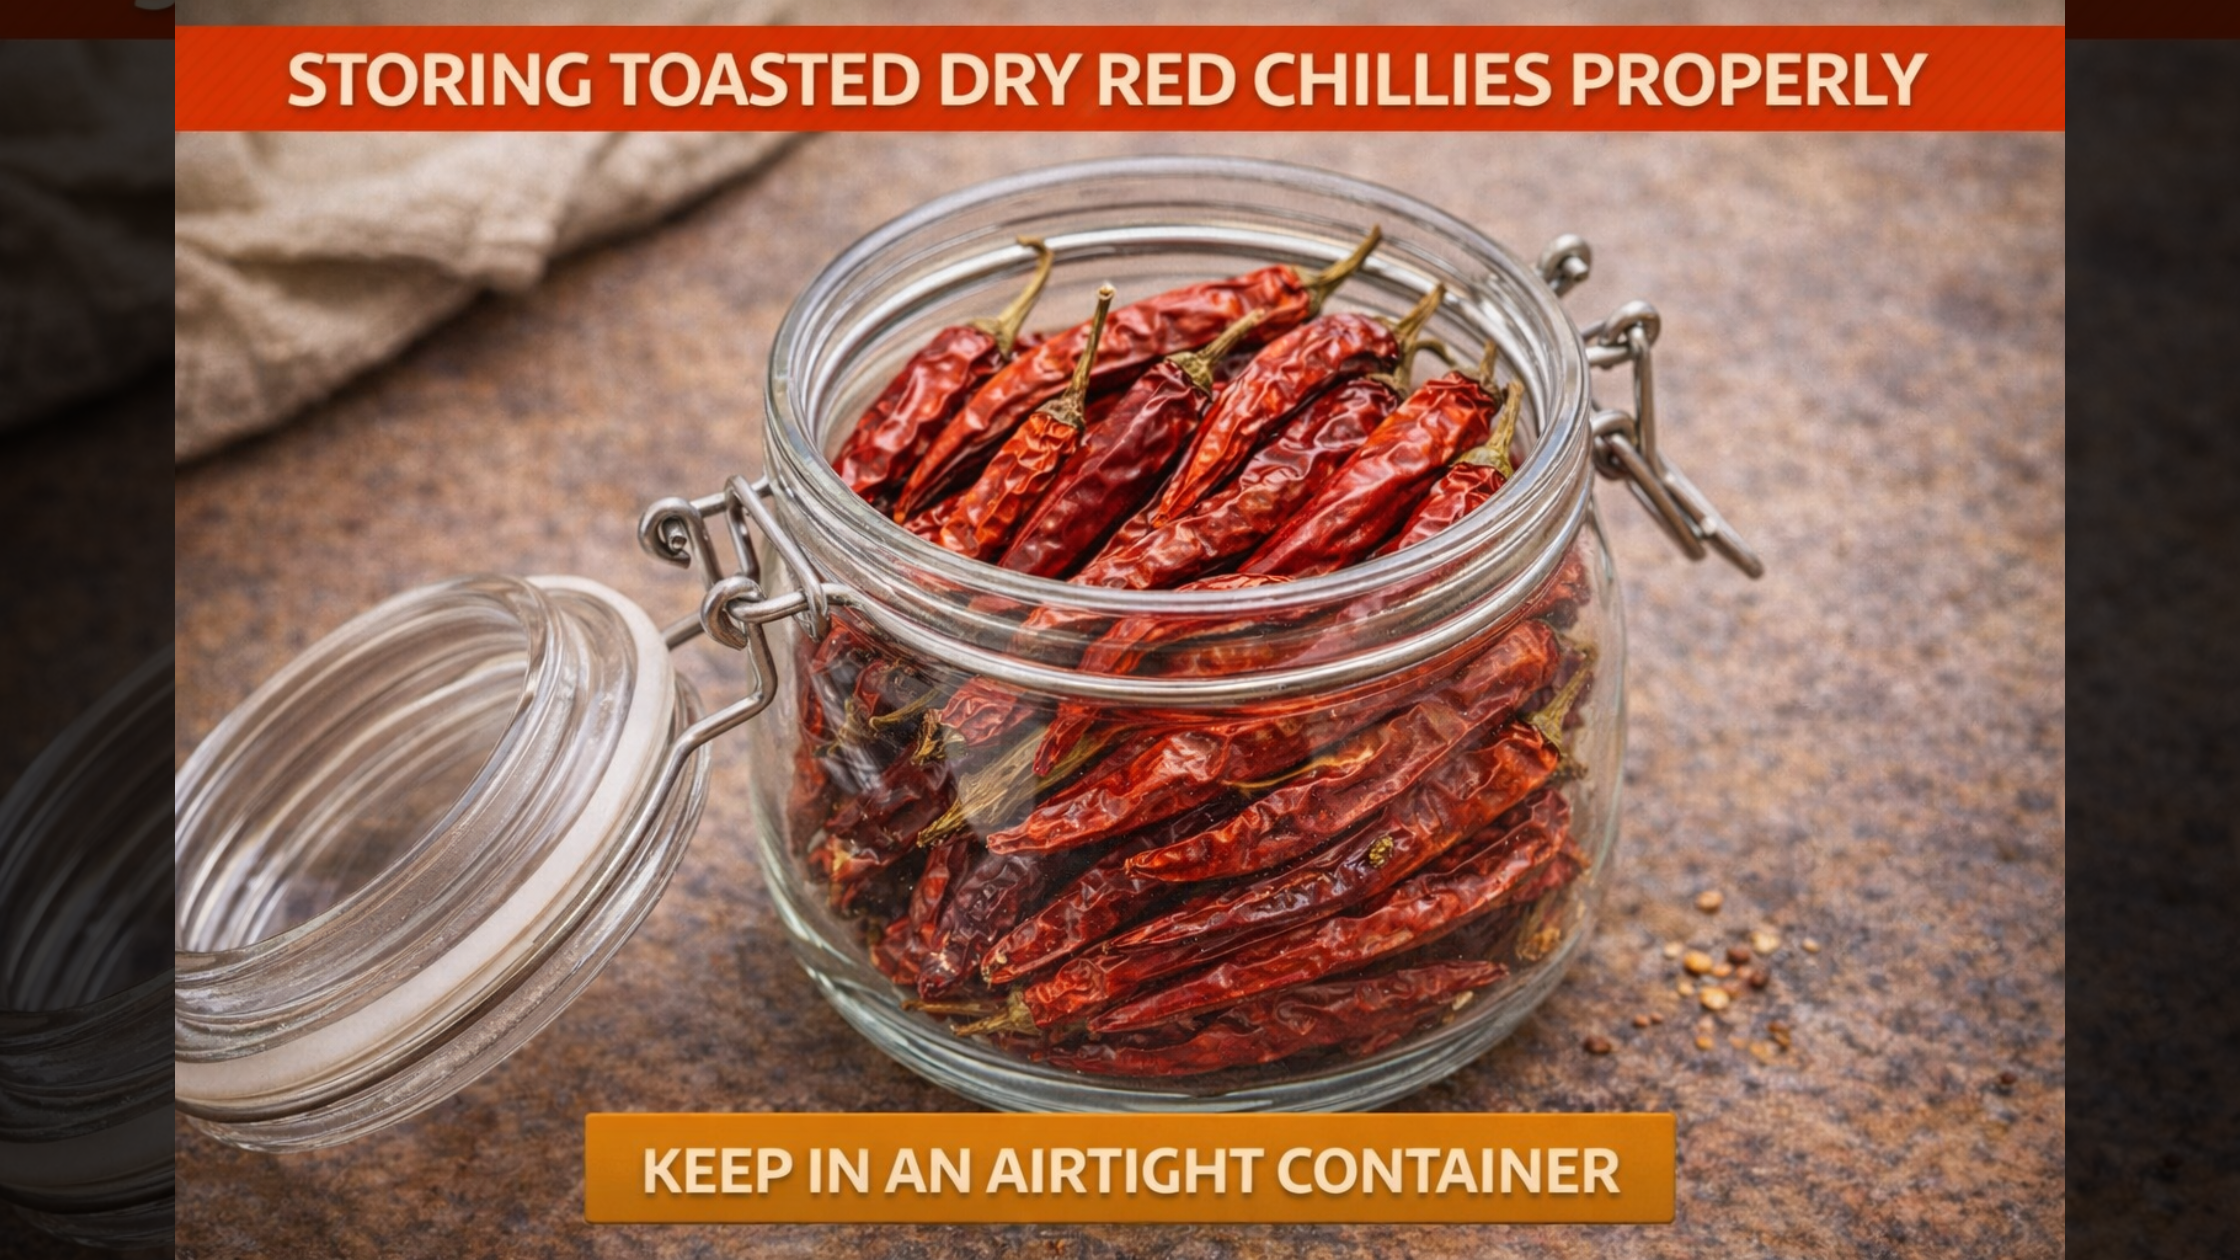
Proper Storage After Toasting
Once cooled completely—and this takes about 15 minutes—store toasted chillies in an airtight container away from light and moisture. Glass jars work excellently for this purpose.
Properly toasted and stored dry red chillies maintain their enhanced flavour for about three months. After this period, the aromatic compounds begin degrading and you’ll notice diminished intensity.
For long-term storage, some spice fruits and vegetables benefit from freezing, and toasted chillies are no exception. Freezable vegetables and certain spice products can maintain quality for up to six months in freezer storage, though I find the texture changes slightly upon thawing make this less ideal for whole toasted chillies.
If you’re planning to grind them into powder, do so within a week of toasting for maximum potency. Ground spices lose their aromatic compounds much faster than whole ones.
How Vipra Overseas Supports Quality Spice Export
As someone who works extensively with agricultural products, I’ve come to appreciate suppliers who understand that quality begins at the source. Vipra Overseas has established itself as a reliable partner for businesses requiring consistent, export-grade agricultural products.
Their portfolio spans fresh fruits, fresh vegetables, various beans, frozen products, premium spices, and grains—all processed and packaged to meet international standards. For restaurants, food manufacturers, and spice traders who depend on consistent quality, having a trusted supplier makes the difference between successful dishes and disappointing results.
The company’s understanding of proper handling, from harvest through processing to export, ensures that products like dry red chillies arrive with optimal oil content and aroma potential. This matters tremendously for anyone serious about developing authentic flavours through traditional techniques like dry roasting.
Their expertise with both fresh and processed products means they can advise on selecting the right varieties for specific culinary applications, whether you’re a commercial kitchen or a spice export business yourself.
Mastering Consistency in Your Chilli Toasting
Perfect chilli toasting becomes intuitive with practice, but certain principles never change. Low to medium heat, constant movement, complete attention, and immediate removal at the first signs of proper development—these are the non-negotiables.
Keep detailed notes when you start practicing. Record the exact time, heat level, chilli variety, and results. After five or six batches, patterns emerge that help you refine your technique for your specific equipment and the products available from your supplier vegetable and spice vendors.
The sensory memory you develop—knowing exactly how properly toasted chillies should smell and look—becomes your most reliable guide. Trust your nose and eyes more than any timer or temperature reading.
With these techniques mastered, you’ll never again wonder whether your chillies are properly toasted. The depth of flavour they bring to your cooking will speak for itself, transforming ordinary dishes into something memorable and proving that sometimes the smallest details make the biggest difference.